Markdown Language Syntax in Inspire

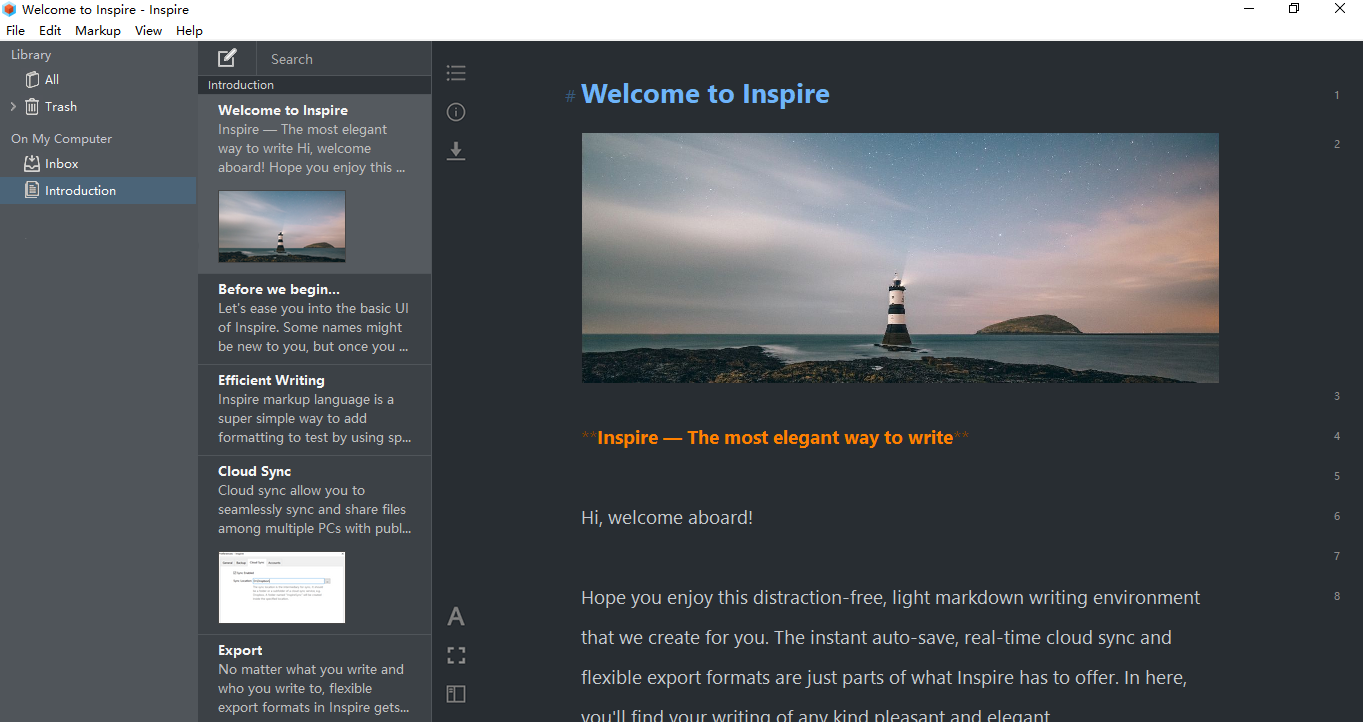
Inspire markup language is a super easy way to add formatting to text by using special characters around them, so you can define them, such as adding two asterisk marks ** around the text to define it as bold. It drives up your workflow, whether you’re writing a blog or a novel.

It takes only few minutes to learn. Once you master it, you’ll never want to write in any other way.

Tutorial

To make headers, preface the phrase with hash marks (or use Ctrl+H). The number of hash marks indicates the level of the heading. For example:

# Header One

## Header Two

### Header Three

To **make a phrase bold**, surround words with two asterisks (or use Ctrl+B).

To _make a phrase italic_, surround words with an underscore (or use Ctrl+I ).

To mark text for deletion, surround words with double vertical lines ||. because it’s somewhat uncessary.

To add comments inline, surround words with ++ (double plus signs).

To create an unordered list, preface each item in the list with a ““(minus sign), a “+” (plus sign) or a “” (middle dot) and a space:

– This is
+ An example
• Of an unordered list

To create an ordered list, preface it with numbers:

  1. This is
  2. An example
  3. Of an ordered list

To create a layered list, preface it with one of the above signs and enter a Tab before the signs to create sub layers and sub-sub layers:

– Item 1 level 1

– Item 1 level 2

– Item 2 level 1

– Item 2 level 2

– Item 3 level 1

– Item 3 level 2

      1. Item 3 level 3 item 1
      2. Item 3 level 3 item 2
      3. Item 3 level 3 item 3

Use “Enter” to escape the bullet list if you need.

If you want to create a block quote, like when you want to provide a motto, simply preface the quote with a >, greater than caret.

> Life is like riding a bicycle. To keep your balance you must keep moving.
> Einstein

To make a divider, type 4 hyphens in a row.

----

Escape Character

Some characters are automatically interpreted as part of the markup formatting. Inserting a backslash before them to indicate they should not be interpreted as format.

> A block quote

\> Not a block quote

Link, Image and Footnote

To create a link, wrap the link text in brackets (or use Ctrl+K).

To insert an image, type (img) (or use Ctrl+M).

To add a footnote, type (fn) (or use Shift+Ctrl+F).

Comment and comment Block

To add a comment, wrap the text you want to add comment to with two plus signs ++.

Or you can start a paragraph with two percent signs %% to make it a comment block.

Code and Code Block

To mark a part of text as code, warp it with two back quotes ``.

Start a paragraph with two single quotation marks '', and you’ll get a code block.

Raw Source and Raw Source block

Wrap the text with two tildes ~~ to mark it as raw source.

Start a paragraph with two tildes ~~ to mark the whole paragraph as a raw source block.

Tables

To create a table in Inspire, just click Markup > Table, or use the shortcut keys Shift + Ctrl + T.

Then change the table properties on the top right corner, and add your table content in the columns as you need.

More Definitions

All definitions can be seen via the button (or use Ctrl+9).

Keyboard Shortcuts: Speed Up Your Workflow

One of the most significant features in Inspire is that it allows you to stay free from using your mouse. In other words, when writing with Inspire Writer, you don’t need your mouse at all, because you can basically use keyboard shortcuts to do whatever you want.

Here are some of the most basic keyboard shortcuts in Inspire:

Basic Operations

  • Ctrl+G for creating a new group
  • Ctrl+N for creating a new sheet

Views and Navigation

  • Ctrl+1, Ctrl+2, Ctrl+3 for switching views
  • Ctrl+↓/↑ for navigating between the sheets
  • Ctrl+8 to show the Navigator
  • F11 for full screen
  • Ctrl+T for Dark Mode theme
  • Ctrl+0/+/- to show default, increased and decreased fonts

Inspire Markup Language

  • Ctrl+B for strong
  • Ctrl+I for emphasize
  • Ctrl+K for link
  • Ctrl+M for image
  • Shift+Ctrl+F for footnote
  • Ctrl+L for clearing Markup
  • Ctrl+H for increasing heading level
  • Ctrl+9 to show the Markup Bar

Frequently Used Features

  • Ctrl+6 to show Export
  • Ctrl+7 to show Statistics
  • Ctrl+R for Preview
  • F7 for spell check

Connect Inspire and Medium

Inspire allows you to publish your work directly from within the app to Medium.

To do so, you need to connect Inspire and Medium first.

Here is how you can do it in details:

1) You need to request an integration token by emailing yourfriends@medium.com.

Medium will then grant access on the Settings page of your Medium account.

2) When your token generation setting is turned on by Medium, go to your setting page, look for the Integration tokens section, and enter the description for Inspire. A token for Inspire will then be generated.

Get integration key for Inspire on Medium
Get the integration key for Inspire on Medium

3) Copy the token.

4) Go to Inspire > File > Preferences… > Accounts. Click the + button, and then Medium….

Connect Inspire the writing app and Medium
Add Medium account to Inspire the app

4) Paste your Integration Token here in the field:

Add Medium integration token to Inspire the writing app
Paste Medium’s integration token to Inspire

There, you’re all set and ready to go.

Please feel free to leave your message in the comment section if you find that there’s anything that I’ve missed here, or if you need to know more about Inspire and/or Medium.

Happy writing! 🙂

Inspire Editor: Distraction-free Writing With Its Little Helpers

Editor is where you spell your magic dust.

In here, you can write without any distractions from the outside world: it’s simple, clean, and free from any bells and whistles that could add to the distraction.

We believe that Markdown is ideal for distraction-free writing.

Now I hear what you’re saying: Why Markdown? What is Markdown anyway? And even if I agree that Markdown is the way to distraction-free writing, how do I do that in Inspire? Rest assured, we have you all covered:

But getting the right tool, i.e. go with markdown writing, is just step one. Then comes step two, creating the perfect writing environment for you to write in. And to do that, Inspire provides you with the following features: They stay out of your way most of the time, and will only come out when you need them.

Of course, these are just some of the features and functions you see and use in Inspire.  With us constantly updating Inspire, the list will sure grow in the future.

What do you want to see in Inspire? Don’t be shy, give us a shout-out and we’ll be in touch. 🙂

Inspire Dark Mode: a more comfortable writing environment for your eyes

If you prefer writing in the dark, or enjoy the less eye-soaring darker background to write in, or you just simply want to protect your eyes, then Dark Mode in Inspire is a good fit for your need.

By clicking ViewDark Mode, or using the shortcut keys Ctrl + T, your Inspire will be in the Dark Mode:

Inspire Dark Mode theme

Inspire Dark Mode is a great tool to protect your eyes if you’re writing late at night, or working in a low-light environment. It reduces the eye strain, allowing you to be more productive, especially if your job requires you to stare at the screen over 10 hours a day, which could be quite normal for writers.

By switching your writing environment to dark mode, say goodbye to eye strain, eyesore and constant squinting in front of the screen.

How do you like it? Feel free to let us know what you think. We’re all ears. 🙂

Publish to WordPress and/or Medium From Within Inspire

You can publish your work written to WordPress or Medium directly from within Inspire Writer the app.

Here is how you do it:

Publish to WordPress from Inspire

To do so:

1) You need to add your WordPress account via File › Preferences…Accounts. Click the + button and Custom WordPress….

Add WordPress account to Inspire the distraction-free writing app
Add WordPress account to Inspire

2) Add your WordPress account information. Click Log In.

Enter your WordPress account credentials in Inspire the distraction-free writing app.
Enter your WordPress account credentials in Inspire.

3) You can also publish your post with a featured image straight from Inspire.

Add a featured image to your post directly in Inspire.

Publish to Medium

To publish your work written in Inspire to Medium:

1) You first need the token from Medium by emailing to <yourfriends@medium.com>.

Medium will then grant access to the Settings page of your Medium account.

2) When your token generation setting is turned on by Medium, go to your setting page, look for the Integration tokens section, and enter the description for Inspire. A token for Inspire will then be generated.

3) When you have the key, go to File › Preferences… > Accounts, then click the +button and Medium….

Connect Medium and Inspire the distraction-free writing app
Connect Medium and Inspire

4) Copy and paste your Medium token. Click Log In.

Provide Medium account integration token to Inspire
Provide Medium account integration token

There you go, easy as a cake.

Over to you…

How do you feel about the process? Do you want to know more about how to publish your work to WordPress and Medium directly from Inspire? Feel free to let me know your thoughts by leaving your comments below, and I’ll respond asap.

Inspire Cloud Sync: another promise to not lose any writing

Clouds, they keep our data safe from leaking or being lost.

Cloud sync in Inspire allows you to seamlessly sync and share files among multiple PCs with public cloud services such as Dropbox, Google Drive, OneDrive and many more on Inspire.

Just specify the folder where your cloud sync service locates in File > Preferences… > Cloud Sync:

Enable cloud sync on Inspire

Repeat the step on your other PCs.

Ta-da! Your copies of Inspire should then sync with one another.

Automatic backup in Inspire: so you don’t need to worry about losing writing

The world collapses in front of you when you lose your two-hours’ writing to not hit the save button in time… And inevitably, your writing efficiency takes the brunt.

What’s with the save setting? Can we not have autosave at all?

Yes, of course, you can have autosave. And this is what Inspire does.

It automatically saves all your writing, so there’s no save button. Auto-save plus cloud sync, you’ll never have to worry about losing any of your writing.

To restore your content:

Choose a Backup Location

  1. Go to File › Preferences… › Backup.
  2. Select the location where you want your backups to be stored.
  3. Click OK.

Restore from a Backup

  1. Go to File › Browse Backups….
  2. Double-click the backup file you want to restore.
  3. Follow the on-screen instructions to restore your files.

Change text font, spacing, line height, and the width of the writing area in Inspire

Inspire looks clean and simple, even to the point where you may doubt if it has enough features to support your distraction-free writing experience. Well, don’t let that fool you: Inspire looks that way, but it sure is equipped with features and tools that work to build you a comfortable writing environment.

If you want to fine-tune the writing experience within the editor by choosing your favorite font, the spacing and line-height, and width that appeals to you the most, you can do so by changing the default settings in Preference.

To do so, click File, then preference…. Then change the metrics here as per your needs.

Change your editor preference in settings

Feel free to try these numbers out till you find the perfect match for you.

Goals in Inspire: keep track of your writing process

A goal helps you keep track of your writing progress. For example, you can set a goal of 5,000 words for your work today. Nothing trumps the excitement of seeing yourself reaching a goal!

The goal in Inspire measures the following metrics:

  • characters
  • character (no spaces)
  • words

To attach a goal to a sheet, click the paperclip icon () on the top left of the editor, you invoke the attachments window. Click Goal, then set the goal for your sheet:

Add a goal to your Inspire sheet.
Add a goal to the Inspire sheet

Or you can invoke the goal window by pressing F5, and then set your goal as per your own needs.

There you go.

Enjoy each step you take towards your goal!